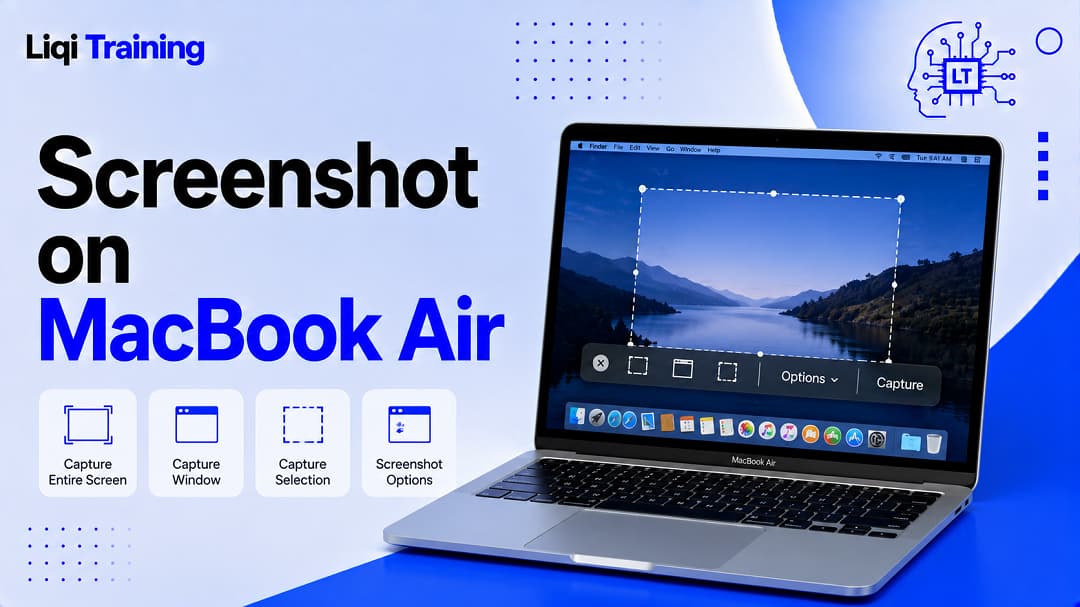
Taking a Screenshot on MacBook Air is one of those basic Mac skills that becomes useful almost immediately. Whether you need to save an error message, capture part of a webpage, show someone what is on your screen, or keep a copy of an online receipt, macOS provides several built-in ways to do it.
You do not need to install a screenshot utility for the standard capture options. MacBook Air includes keyboard shortcuts for capturing the entire display, a selected area, or a specific window. You can also use the built-in Screenshot app for more control over what gets captured, where the file is saved, and whether a delay or pointer is included.
The best method depends on what you are trying to capture. A keyboard shortcut is usually fastest when you already know exactly what you need, while the Screenshot app is more useful when you want to choose an area, adjust options, or record the screen.
Important Notes:
- Shift-Command-3 captures the entire MacBook Air screen.
- Shift-Command-4 lets you select a specific portion of the display.
- Shift-Command-4, then Space bar captures a particular window or menu.
- Shift-Command-5 opens the Screenshot controls for still images and screen recordings.
- Screenshots normally save to the desktop unless you change the destination.
- Adding Control to a screenshot shortcut can copy the capture to the Clipboard instead of simply saving it as a file.
- A screenshot can be edited or marked up after capture using the tools available in macOS.
- If you plan to erase or sell your MacBook Air, screenshots and other personal files should be backed up before resetting or wiping the computer.
The fastest way to screenshot on a MacBook Air
For most people, the quickest way to take a screenshot is with a keyboard shortcut. MacBook Air supports several built-in shortcuts, and they work without opening a separate application.
To capture everything currently visible on the display, press Shift-Command-3. Press the three keys together and release them. macOS captures the full screen and normally saves the resulting image to the desktop. Apple identifies Shift-Command-3 as the shortcut for capturing the entire screen.
This is useful when you need a complete record of what is displayed, such as a full webpage, an application interface, or a system message.
If you only need part of the display, Shift-Command-4 is usually a better choice. After pressing the shortcut, your pointer changes to a crosshair. Click and drag across the area you want to capture, then release the trackpad or mouse button. The selected region becomes the screenshot.
You can also adjust the selection while you are making it. Apple notes that holding the Space bar while dragging allows you to move the selected area without changing its dimensions. Pressing Escape cancels the capture.
This makes Shift-Command-4 particularly useful for articles, documents, browser pages, error messages, images, and other content where capturing the entire screen would include unnecessary information.
MacBook Air screenshot shortcuts at a glance
The main shortcuts are straightforward:
| What you want to capture | Keyboard shortcut |
|---|---|
| Entire screen | Shift-Command-3 |
| Selected portion | Shift-Command-4 |
| Specific window or menu | Shift-Command-4, then Space bar |
| Screenshot controls | Shift-Command-5 |
Apple also documents Shift-Command-6 for Macs equipped with a Touch Bar. That shortcut is not relevant to current MacBook Air models without a Touch Bar, but it remains part of Apple’s broader Mac screenshot shortcut documentation.
For everyday MacBook Air use, remembering the first three shortcuts is enough for most screenshot tasks.
How to screenshot a specific area on MacBook Air
A partial screenshot is often more useful than a full-screen capture because it removes unrelated information.
Start by pressing Shift-Command-4. The pointer becomes a crosshair. Position it at one corner of the area you want to capture, then click and drag across the content.
When the selection covers exactly what you need, release the trackpad or mouse button. macOS creates the screenshot.
If you start the selection in the wrong place, you do not necessarily have to cancel and begin again. Hold the Space bar while dragging to reposition the selected area without changing its size. If you want to abandon the capture completely, press Escape.
This method is particularly useful when taking a screenshot of a single paragraph, image, section of a website, application dialog, or other small part of the display.
How to screenshot a window on MacBook Air
You can capture an individual application window without manually dragging around its borders.
First, make sure the window you want is visible. Press Shift-Command-4, then press the Space bar. The pointer changes to a camera-style selector.
Move the pointer over the window you want to capture. macOS highlights the window so you can see what will be included. Click the window to take the screenshot.
This can produce a cleaner result than manually selecting the window because macOS handles the window boundaries for you.
Apple also provides an option to exclude the window’s shadow: hold the Option key while clicking the window.
The window capture method is useful when documenting software problems, creating tutorials, or sharing an application screen without including everything else visible on your MacBook Air.
How to screenshot a menu on MacBook Air
Menus can also be captured using the screenshot shortcuts.
Open the menu you want to show, then press Shift-Command-4. You can select the menu area manually, or use the window/menu capture method when appropriate.
For a menu or specific menu items, Apple’s Mac screenshot documentation also describes opening the menu first and then using Shift-Command-4 to select the relevant area.
This is useful when writing instructions for someone else because the screenshot can show the exact command they need to find.
How to use the Screenshot app on MacBook Air
Keyboard shortcuts are fast, but the built-in Screenshot app gives you more control.
Press Shift-Command-5 to open the Screenshot controls. The on-screen toolbar provides options for capturing the entire screen, a window, or a selected portion. It also includes screen-recording controls.
The Screenshot app is particularly useful when you want to change settings before taking the capture.
Depending on your macOS version and the capture type, the available options can include:
- Choosing where the screenshot is saved
- Setting a timer
- Showing or hiding the mouse pointer
- Showing a floating thumbnail after capture
- Selecting screenshot or screen-recording options
Apple states that the Screenshot app can be opened with Shift-Command-5 and is available on Macs running macOS Mojave 10.14 or later.
That means the shortcut is not limited to newer MacBook Air hardware. However, individual features can vary according to the macOS version installed on the computer.
Where screenshots are saved on a MacBook Air
By default, screenshots taken with the standard keyboard shortcuts are saved to the desktop. Apple says screenshots are saved as PNG files by default through the standard screenshot process.
If you take screenshots regularly, the desktop can become crowded quickly. Fortunately, you can change the destination through the Screenshot controls.
Press Shift-Command-5, select Options, and look for the Save to settings. You can select one of the available destinations or choose another location.
This is useful if you are creating a large number of screenshots for work, school, documentation, or a project. Instead of moving every screenshot manually afterward, you can direct new captures to an appropriate folder.
Apple also allows you to drag the floating screenshot thumbnail into another location before the file is saved.
How to copy a screenshot instead of saving it
Sometimes you do not want a screenshot file sitting on your desktop. You may simply want to paste the image into an email, document, chat, presentation, or image editor.
macOS can send a screenshot to the Clipboard by adding the Control key to the relevant screenshot shortcut.
For example, instead of:
Shift-Command-3
use:
Control-Shift-Command-3
This captures the entire screen and places the result on the Clipboard rather than treating it as a normal screenshot file. Apple documents this Control-key variation as a way to copy a screenshot so it can be pasted elsewhere.
You can then use Command-V to paste the image into an application that accepts images.
This works well when you are sending a screenshot directly into a message or document and do not need a permanent copy.
If you are unfamiliar with Mac keyboard combinations, it may also help to learn the basic copy and paste shortcuts on MacBook, since Command-C and Command-V are used frequently when working with screenshots and other content.
How to edit a screenshot after taking it
A screenshot does not have to be used exactly as captured.
After taking a screenshot, macOS can display a temporary thumbnail. Clicking the thumbnail opens editing and markup options, allowing you to make changes before saving or sharing the image. Apple also documents Markup tools for annotating screenshots.
For example, you may want to draw attention to a particular button, add an annotation, or crop the image before sending it to another person.
If the thumbnail appears and you do not need to edit the screenshot, you can simply wait for macOS to save it.
You can also drag the thumbnail into a document or folder, depending on the workflow you are using.
How to take a screenshot with a timer
A timer is useful when the content you need to capture requires a few seconds to prepare.
For example, a menu may disappear when you press a keyboard shortcut, or you may need to position the pointer in a particular location before the capture happens.
Press Shift-Command-5 to open Screenshot, then select Options. Apple’s Screenshot controls include a timer setting that can delay the capture.
After choosing the desired delay, configure the screen exactly as you want it. The screenshot will be captured after the selected waiting period.
This method is generally more practical than trying to coordinate a keyboard shortcut while simultaneously arranging a menu or other temporary interface element.
How to include or hide the mouse pointer
There are situations where the pointer is useful in a screenshot and others where it is distracting.
The Screenshot app provides an option to control whether the pointer appears in the capture. Open Shift-Command-5, select Options, and adjust the relevant pointer setting when it is available for the capture type.
For instructional screenshots, showing the pointer can sometimes help demonstrate where a user should click. For polished documentation or presentations, hiding it can produce a cleaner image.
The important distinction is that pointer visibility is controlled through the Screenshot options rather than being something you need to edit manually after every capture.
Screenshot on MacBook Air versus screen recording
A screenshot creates a still image. A screen recording creates a video.
If you need to demonstrate a sequence of actions rather than show a single moment, the Screenshot app can also record the screen. Press Shift-Command-5 and choose one of the available recording options. Apple documents options for recording the entire screen or a selected portion, with additional recording controls available through the Screenshot toolbar.
This can be useful for software demonstrations, troubleshooting, tutorials, and showing someone exactly how a problem occurs.
A screenshot remains the better choice when one image communicates everything you need.
Why your MacBook Air screenshot may not look the way you expected
Most screenshot problems are related to selecting the wrong capture mode or misunderstanding where macOS saves the resulting file.
If you pressed Shift-Command-3 and expected to select an area, the shortcut is doing exactly what it is designed to do: it captures the entire display. Use Shift-Command-4 for a custom selection instead.
If you used Shift-Command-4 but want an entire application window, press the Space bar after activating the shortcut.
If you took the screenshot successfully but cannot find it, check the desktop first because that is the default location for standard screenshots. If you previously changed the destination, open Screenshot with Shift-Command-5 and check the Options menu to see where captures are being saved.
Another possibility is that the screenshot was copied to the Clipboard because you included the Control key. In that situation, you may not see a new image file on the desktop.
Some applications can also restrict screenshot capture. Apple specifically notes that certain apps may not allow pictures of their windows to be taken.
Therefore, if a particular application behaves differently from normal Mac apps, the limitation may be imposed by the application rather than indicating a problem with your MacBook Air.
What to do if the screenshot shortcut does not work
If one of the screenshot shortcuts is not responding, first make sure you are pressing the correct keys together.
The standard shortcuts are:
Shift-Command-3 for the entire screen.
Shift-Command-4 for a selected area.
Shift-Command-5 for the Screenshot controls.
Apple allows Mac screenshot shortcuts to be customized through System Settings > Keyboard > Keyboard Shortcuts > Screenshots. If a shortcut has been changed or conflicts with another keyboard command, checking this section can help identify the problem.
If you use an external keyboard rather than the built-in MacBook Air keyboard, verify that the Command and Shift keys are functioning normally.
You can also open Screenshot through the Applications/Utilities area rather than relying on the keyboard shortcut. Apple identifies Screenshot as a utility available from the Applications folder’s Utilities location.
How screenshots fit into a MacBook Air backup strategy
Screenshots may seem insignificant, but some can contain information you cannot easily recreate, such as receipts, confirmation pages, work instructions, project information, or important conversations.
If you regularly use your MacBook Air for work or personal records, consider including important screenshots in your normal backup routine. If you have not established one yet, see How to Back Up Your MacBook: Easy Ways to Protect Your Files and Photos for a broader guide to protecting files on your Mac.
This becomes especially important before performing major maintenance.
For example, if you intend to reset the MacBook Air, make sure important files are backed up first. A factory reset is designed to remove data and return the Mac to a setup state, so it should not be treated as a casual troubleshooting step. See How to Factory Reset a MacBook Air or MacBook Pro: Complete Reset Guide before proceeding with a factory reset.
If your intention is to permanently remove your information before handing the computer to another person, a dedicated guide such as How to Wipe a MacBook Before Selling or Giving It Away is more appropriate than simply restarting or resetting the computer.
Frequently Asked Questions
What is the shortcut for a screenshot on MacBook Air?
The shortcut depends on what you want to capture. Use Shift-Command-3 for the entire screen, Shift-Command-4 for a selected portion, and Shift-Command-5 to open the Screenshot controls.
How do I screenshot only part of my MacBook Air screen?
Press Shift-Command-4, then click and drag across the portion of the display you want to capture. Release the trackpad or mouse button when the selection is correct.
How do I screenshot a single window on MacBook Air?
Press Shift-Command-4, press the Space bar, and then click the window you want to capture.
Where does my MacBook Air save screenshots?
The default destination is the desktop. You can change the save location through Shift-Command-5 > Options > Save to.
Can I paste a screenshot directly without saving it?
Yes. Add the Control key to the appropriate screenshot shortcut to copy the capture to the Clipboard. For example, Control-Shift-Command-3 copies the entire screen.
Can I screenshot a MacBook Air screen without using the keyboard?
Yes. Open the Screenshot utility from macOS and use its on-screen controls. You can access it with Shift-Command-5 or locate Screenshot through the Applications/Utilities area.
Can I record my MacBook Air screen instead of taking a screenshot?
Yes. The Screenshot utility includes screen-recording controls in addition to still-image capture. Press Shift-Command-5 and select the appropriate recording option.
The easiest screenshot method for most MacBook Air users
For everyday use, there is no need to memorize every macOS screenshot feature.
Start with three shortcuts: Shift-Command-3 for everything on the screen, Shift-Command-4 for a selected area, and Shift-Command-5 when you want more control.
Once those become familiar, window captures, Clipboard screenshots, timers, save-location controls, and screen recordings are easy extensions of the same workflow.
The biggest advantage of using the built-in MacBook Air screenshot tools is that they cover most common capture needs without requiring additional software. Apple provides both direct keyboard shortcuts and the Screenshot utility, so you can choose between speed and control depending on the task.
If you frequently work with screenshots, changing the save location can keep your desktop organized. If you share screenshots with others, the Clipboard shortcut and Markup tools can make the process faster. And if a screenshot contains important personal or work information, remember to treat it like any other valuable file and include it in your backup routine.
ADVERTISEMENT