A MacBook can hold years of photos, documents, downloads, work projects, messages, application data, and personal files. If the internal drive fails, the MacBook is lost, or you accidentally delete something important, having another copy of that information can make the difference between a minor inconvenience and permanent data loss.
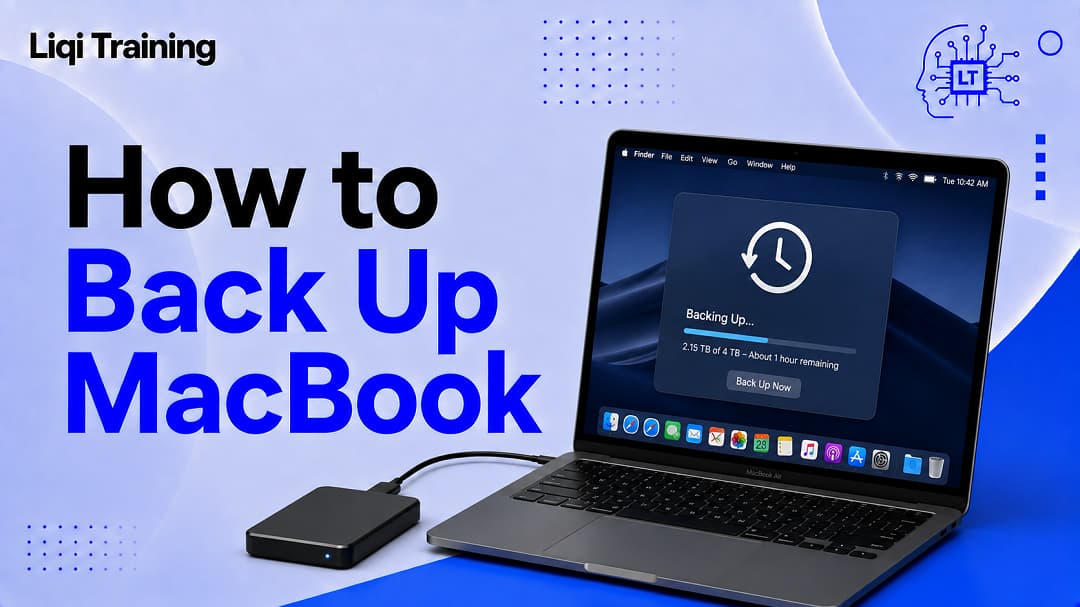
The most comprehensive built-in way to back Up MacBook data is Apple’s Time Machine. It can automatically back up files to an external storage device and retain older versions of files, giving you a way to recover information that was changed or deleted. Apple also supports iCloud for syncing and storing selected data, while individual files can be manually copied to external storage.
These approaches are not identical. Time Machine is designed as a Mac backup system, whereas iCloud is primarily a cloud synchronization and storage service. Understanding that difference is important when deciding how to protect your MacBook.
Why you should back up your MacBook
Your MacBook’s internal storage is convenient, but it should not be the only place where important information exists.
A hardware failure can make locally stored files inaccessible. Accidental deletion can remove documents or photos you still need. A software problem can also leave you needing to restore files from an earlier point in time.
A backup gives you another copy.
Apple’s Time Machine is particularly useful because it can automatically back up files and preserve historical versions. Apple says Time Machine can be used to recover files that were deleted, changed, or are no longer accessible on the Mac.
This is different from simply copying today’s files to an external drive. If you overwrite or delete something and then perform another manual copy, the older version may no longer exist.
Time Machine is designed to address that problem by maintaining a history of backups.
The best way to back up a MacBook
For most MacBook owners who want a straightforward, comprehensive local backup, Time Machine with an external storage device is the best starting point.
Time Machine is built into macOS and can automatically back up files including applications, music, photos, email, and documents.
You connect a suitable external drive, configure it as the Time Machine backup disk, and allow macOS to perform backups automatically.
Apple recommends using a backup device with at least twice the storage capacity of the Mac. For example, if your MacBook has 1 TB of internal storage, Apple recommends a backup disk of around 2 TB or more.
A larger drive can provide additional room for historical backups.
How to back up MacBook with Time Machine
Setting up Time Machine on a current version of macOS is relatively simple.
Connect an external storage device to your MacBook. Depending on the MacBook and drive, you may need a compatible USB, USB-C, or Thunderbolt connection or adapter.
Then open:
Apple menu > System Settings > General > Time Machine
Select Add Backup Disk or the Add (+) button, then select the external storage device you want to use. Apple documents this as the setup path for macOS Ventura 13 and later.
During setup, macOS may ask whether you want to erase the external drive so it can be used for Time Machine. If the drive contains files you need, do not approve an erase until those files have been moved somewhere else.
You can also enable Encrypt Backup. If you do, you will create a backup password. Apple warns that you will need that password when restoring files from the encrypted backup.
Once the setup is complete, Time Machine can begin backing up your Mac.
How to make a Time Machine backup immediately
Time Machine is designed to work automatically, but you do not have to wait for its next scheduled backup.
When the Time Machine controls are available in the menu bar, select the Time Machine menu and choose Back Up Now. Apple documents this option for manually starting a backup.
This is useful before making a major change to your MacBook.
For example, you may want to make a fresh backup before installing significant software, troubleshooting a serious problem, or preparing the computer for a reset.
After starting the backup, you can use the Time Machine menu to check its progress and see when the latest backup was completed.
How often does Time Machine back up a MacBook?
Once configured, Time Machine handles backups automatically.
Apple says Time Machine keeps hourly backups for the past 24 hours, daily backups for the past month, and weekly backups for previous months. As the backup disk fills up, the oldest backups are removed to make room for newer ones.
This historical approach is one of Time Machine’s major advantages.
Suppose you edited a document yesterday and discovered today that you accidentally removed an important section. A basic file copy from today would not necessarily help. Time Machine may have an earlier version available.
The first backup can take considerably longer than subsequent backups because the Mac needs to copy the initial set of data. Apple notes that you can continue using your Mac while the backup is running, and later backups only need to process changed files.
How much storage do you need for a MacBook backup?
The amount of storage you need depends on how much data is on the MacBook and how much backup history you want to retain.
Apple recommends using a Time Machine backup disk with at least twice the storage capacity of the Mac.
For example:
| MacBook internal storage | Suggested minimum Time Machine capacity |
|---|---|
| 256 GB | 512 GB |
| 512 GB | 1 TB |
| 1 TB | 2 TB |
| 2 TB | 4 TB |
These are practical minimums based on Apple’s two-times guidance rather than a guarantee of how long the backup history will last. A MacBook with a large amount of changing data can consume backup space differently from one that rarely changes.
A larger backup disk generally gives Time Machine more room to retain historical versions.
Apple also recommends using the Time Machine disk primarily for Time Machine backups rather than treating it as an ordinary storage drive.
Can you back up a MacBook without an external hard drive?
Yes, but the answer depends on what you mean by “backup.”
You can use iCloud to synchronize and store supported information, including photos, videos, contacts, calendars, notes, passwords, and files stored in iCloud Drive. Apple also allows Desktop and Documents folders to be stored in iCloud Drive.
However, iCloud should not automatically be treated as a replacement for a complete Time Machine backup.
Apple explicitly distinguishes iCloud from Mac backup. Its MacBook Pro documentation says iCloud does not back up the entire Mac.
That distinction matters.
If you want an independently stored copy of your Mac’s files and historical versions, Time Machine remains the more appropriate built-in solution.
How to back up MacBook to iCloud
iCloud is useful for keeping selected information available across Apple devices.
Open:
Apple menu > System Settings > Apple Account > iCloud
From there, you can review which services are using iCloud and configure supported categories.
Apple says iCloud can keep photos, videos, contacts, calendars, notes, passwords, and other selected information synchronized across devices signed in to the same Apple Account. iCloud Drive can also store files, including content from Desktop and Documents when that feature is enabled.
Keep an eye on your available iCloud storage. Apple provides 5 GB of iCloud storage with an Apple Account, with additional storage available through paid iCloud+ plans.
If your iCloud storage is full, synchronization and storage of additional data can be affected.
For that reason, check both what is being synchronized and whether there is enough cloud storage rather than assuming every file on the MacBook is automatically protected.
Time Machine vs. iCloud: which should you use?
Time Machine and iCloud serve different purposes.
| Feature | Time Machine | iCloud |
| Full Mac backup | Designed for Mac file backup | No |
| Automatic backups | Yes | Synchronizes selected data |
| Historical file versions | Yes | Depends on the service/data |
| External drive required | Yes, for local Time Machine | No |
| Access across Apple devices | Not its primary purpose | Yes |
| Protects selected cloud-synced data | Not its primary purpose | Yes |
| Useful before wiping a Mac | Yes | Helpful, but not sufficient by itself |
Apple describes Time Machine as the built-in Mac backup system, while iCloud is used to sync and store selected data across devices.
For important information, using both can provide complementary protection: Time Machine for a local historical backup and iCloud for supported cloud-synchronized data.
Neither approach should be misunderstood as an automatic guarantee that every piece of information on your MacBook exists in multiple independent locations.
How to manually back up files from a MacBook
You do not need Time Machine to make a simple copy of individual files.
Connect an external USB drive or other storage device to the MacBook. Open Finder and locate the documents, photos, videos, or other files you want to preserve.
Drag the selected files to the external storage device.
Apple identifies manually copying files to another storage device as one of the available Mac backup approaches. Photos, videos, and documents can be copied to an external drive and later copied back when needed.
This method is useful when you only need a small selection of files.
However, manual copying has an important limitation: it does not automatically maintain a historical backup system. If you replace the old copy with a newer one, you may lose access to the earlier version.
For ongoing protection, Time Machine is generally more convenient.
How to back up photos from MacBook
Photos can occupy a significant amount of storage, so they deserve particular attention when creating a backup strategy.
If you use iCloud Photos, your photo library can be synchronized with iCloud and made available across devices using the same Apple Account. Apple lists photos among the data that iCloud can store and synchronize.
You can also include your Mac’s photo library in a Time Machine backup.
Using both approaches can provide useful redundancy. iCloud makes the supported library accessible across your Apple devices, while Time Machine provides a separate local backup history.
The key is not to assume that synchronization and backup are identical. If a file is synchronized across devices, an action taken within the synchronized service can propagate across those devices. A separate backup gives you another recovery point.
How to back up MacBook before a factory reset
A backup is especially important if you are about to reset your MacBook.
A factory reset or complete erase is intended to remove information from the Mac. If you erase the computer before confirming that your important files exist somewhere else, you may have no convenient way to recover them.
Before starting the reset, create a fresh Time Machine backup or make sure your other backup is current.
You can then restore information from the Time Machine backup after reinstalling macOS or setting up another Mac. Apple says Migration Assistant can use a Time Machine backup to transfer personal files, apps, and user-account information to a Mac.
For a detailed reset procedure, see How to Factory Reset a MacBook Air or MacBook Pro: Complete Reset Guide.
If you are selling or giving the Mac away rather than continuing to use it, follow that with the appropriate ownership-transfer procedure described in How to Wipe a MacBook Before Selling or Giving It Away.
How to restore files from a Time Machine backup
A backup is only useful if you can retrieve information from it.
Time Machine allows you to browse previous backups and restore individual files or folders.
Open the location where the missing item originally existed. Then use the Time Machine controls to browse through previous backup dates. Select the file or folder you need and choose Restore. Apple says restored items return to their original location.
For example, if you accidentally delete a document from your Documents folder, you can browse Time Machine for an earlier version and restore it.
This historical recovery is one of the strongest reasons to use Time Machine instead of relying exclusively on manually copied files.
How to restore a MacBook from a Time Machine backup
If you need to recover a larger amount of information, Apple’s Migration Assistant can transfer data from a Time Machine backup.
Apple says Migration Assistant can restore personal files, applications, and user-account information from a Time Machine backup.
If macOS itself needs to be reinstalled first, Apple provides a Recovery-based process. On an Apple silicon Mac, startup options are accessed by shutting down and holding the power button until startup options appear. On an Intel Mac, Apple documents using Command-R during startup to enter macOS Recovery.
The exact recovery procedure depends on the Mac’s processor and macOS version, so avoid applying an Intel-specific startup procedure to an Apple silicon Mac.
How to check whether Time Machine is backing up
Do not simply connect a drive once and assume your MacBook remains protected forever.
Open the Time Machine controls and check the most recent backup date. Apple says the Time Machine menu can display whether a backup is currently in progress and the date and time of the latest completed backup.
If the drive is disconnected, Time Machine can resume its backup schedule when the drive is connected again. Apple recommends ejecting the backup disk or shutting down the Mac before disconnecting it.
If you regularly use a portable backup drive, develop a habit of connecting it often enough for Time Machine to maintain a useful history.
What to do if Time Machine will not back up
A failed backup should not be ignored.
Start by checking whether the external drive is connected and recognized by the Mac. If the drive is not available, Time Machine cannot complete its normal backup process.
Also check whether the backup disk has sufficient free space and whether macOS reports a specific error.
If Time Machine repeatedly asks you to create a new backup, be cautious. Apple’s support documentation warns that creating a new backup can delete the existing backup history, and your data is not fully backed up until the new backup is complete.
If the existing backup contains important historical data, investigate the existing backup before choosing an option that replaces it.
For a serious backup problem, Apple’s Time Machine troubleshooting documentation is a better starting point than immediately formatting the backup drive.
Should you encrypt your MacBook backup?
For many users, encryption is worth considering because a backup can contain a large amount of personal information.
When setting up a Time Machine disk, macOS provides an Encrypt Backup option. Apple says you create a backup password when enabling encryption and will need that password when restoring files from the encrypted backup.
That creates an important trade-off: stronger protection also makes the backup password important.
Do not create an encrypted backup and then forget the password. Keep the credential somewhere secure and accessible to you when recovery is needed.
A backup that you cannot decrypt when you need it is not a useful recovery solution.
Should the Time Machine drive stay connected?
For a desktop Mac, leaving a backup drive connected can make automatic backups convenient.
For a MacBook, however, many users disconnect an external drive when traveling. That is fine as long as you reconnect it regularly.
Apple says Time Machine resumes its backup schedule when the backup disk is reconnected.
The important limitation is obvious: if the backup disk is disconnected, it cannot receive new backups during that period.
If your MacBook is frequently away from home, consider how often the backup drive is available and whether important files have another protected copy.
Can you back up MacBook to another Mac?
Apple supports several approaches to moving or storing Mac data, but Time Machine’s standard setup uses a supported backup disk or supported network destination rather than simply treating another Mac as an ordinary USB backup drive.
If your goal is to migrate to a new Mac, a Time Machine backup can be used with Migration Assistant to transfer your files and account information.
This makes Time Machine useful not only for disaster recovery but also when replacing an older MacBook.
Instead of manually rebuilding your environment file by file, you can use a backup to transfer supported information to the new computer.
What about manually copying everything to a USB drive?
Manual copying is better than having no second copy, but it is not equivalent to a managed backup system.
You can drag photos, documents, videos, and other files from your MacBook to an external drive. Apple explicitly lists this as a manual backup method.
The problem is that you have to remember to repeat the process. You also have to decide which files changed and which versions should be retained.
Time Machine automates those decisions for supported files and maintains a historical backup schedule.
For occasional file transfers, manual copying is practical. For ongoing protection of a MacBook, an automated backup is generally more reliable.
A practical MacBook backup strategy
You do not necessarily need a complicated backup system.
For most MacBook users, a sensible starting point is:
Primary backup: Time Machine to an appropriately sized external drive.
Cloud synchronization: iCloud for supported photos, files, passwords, notes, and other data you want available across Apple devices.
Important files: Keep particularly valuable documents and photos in more than one location.
The objective is redundancy.
If your MacBook and its external backup drive are sitting in the same bag and the bag is lost, both copies can disappear together. Keeping an additional copy somewhere else provides another layer of protection.
The appropriate strategy depends on how valuable the information is, how often it changes, and how much inconvenience or loss you could tolerate if the MacBook became unavailable.
Frequently Asked Questions
What is the easiest way to back up a MacBook?
For a comprehensive local backup, use Apple’s built-in Time Machine with an external storage device. Time Machine can automatically back up files and maintain historical versions.
Does Time Machine back up everything on a MacBook?
Time Machine backs up your files and supported personal data, including apps, photos, music, email, and documents. Apple’s documentation also notes that Time Machine does not back up the macOS operating system itself.
How big should a MacBook backup drive be?
Apple recommends a Time Machine backup disk with at least twice the storage capacity of the Mac. A MacBook with 1 TB of internal storage would therefore ideally use a 2 TB or larger backup disk.
Is iCloud a complete backup of my MacBook?
No. iCloud can synchronize and store selected data, but Apple states that iCloud does not back up the entire Mac.
Can I back up a MacBook without Time Machine?
Yes. Apple supports manually copying files to an external storage device, using iCloud for supported data, and using compatible third-party backup utilities.
How often should I back up my MacBook?
Time Machine automatically handles backups when configured. Apple says it creates hourly, daily, and weekly backup history according to its retention schedule.
If you rely on manual backups, the appropriate frequency depends on how often your important files change. Files that change daily should not be backed up only once every few months.
Can I restore deleted files from Time Machine?
Yes. Time Machine can be used to browse previous backups and restore individual files or folders, including earlier versions of documents.
Can I use a Time Machine backup on a new Mac?
Yes. Apple’s Migration Assistant can use a Time Machine backup to transfer personal files, apps, and user-account information to another Mac.
Should I back up before resetting or wiping my MacBook?
Yes. A reset or complete erase can remove information from the Mac. Create and verify a current backup before starting. If you are selling or giving away the computer, see How to Wipe a MacBook Before Selling or Giving It Away after completing your backup.
Protecting your MacBook starts with a backup
The best time to discover that you needed a backup is not after your MacBook has failed.
For most users, Time Machine provides the simplest built-in way to create an ongoing backup. Connect an appropriately sized external drive, configure it through System Settings > General > Time Machine, and let macOS maintain the backup history.
iCloud adds a different layer by synchronizing supported information across Apple devices, while manual file copying provides a straightforward way to preserve individual documents, photos, and other files.
The important distinction is that synchronization is not the same as a complete backup. A reliable backup strategy should give you another recoverable copy of information you cannot afford to lose.
Once Time Machine is configured, check its status periodically and make sure recent backups are actually completing. And before you factory reset, wipe, sell, or give away your MacBook, create a fresh backup and verify that your important files are accessible.
A few minutes spent setting up and checking a backup can save far more time when something eventually goes wrong.
ADVERTISEMENT